Difference between revisions of "Columns"
m (small typo) |
m (spell-fix) |
||
| Line 7: | Line 7: | ||
* streams : set different text synchronized side-by-side (e.g. bilingual editions) | * streams : set different text synchronized side-by-side (e.g. bilingual editions) | ||
| − | Columns and columnset are two different mechanism | + | Columns and columnset are two different mechanism to produce a document |
with text and two or more columns. | with text and two or more columns. | ||
* The <code>columns</code> mechanism is the older one with limited control about the placement of figures but allows you to mix one column and multicolumns text on a page. | * The <code>columns</code> mechanism is the older one with limited control about the placement of figures but allows you to mix one column and multicolumns text on a page. | ||
Revision as of 16:12, 29 June 2012
There are different possibilities to typeset text in two or more columns:
- columns : for simple cases of multi column text
- paragraphs : if you need a table-like structure (translations, questionaires etc.)
- column sets : the flexible way for varying columns or other complex tasks
- streams : set different text synchronized side-by-side (e.g. bilingual editions)
Columns and columnset are two different mechanism to produce a document with text and two or more columns.
- The
columnsmechanism is the older one with limited control about the placement of figures but allows you to mix one column and multicolumns text on a page. columnsetsis a new version of the column mechanism with more control about the placement of figures and other features like spanned columns etc. (look at the manual for more); it is better thancolumnsfor magazine-like layouts.
Contents
Columns
\startcolumns[n=3]
\input knuth
\stopcolumns
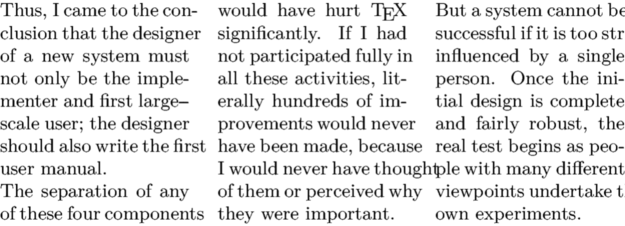
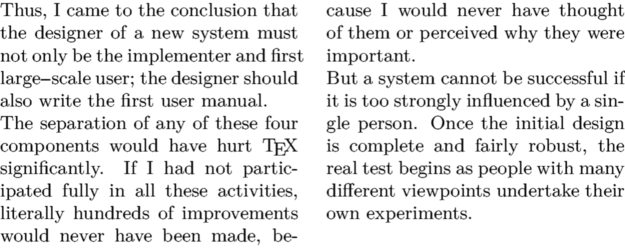
You can add all the options of \setupcolumns to \startcolumns. For example, simple ruled columns are easy:
\setupbodyfont[9pt]
\startcolumns[n=2,rule=on]
\input knuth
\stopcolumns
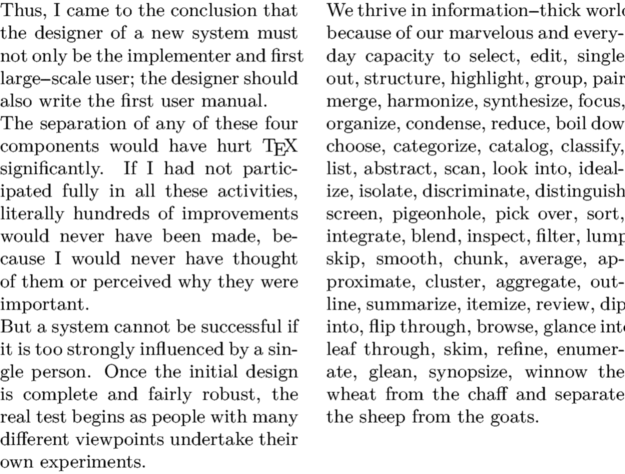
Normally, columns are automatically balanced with the text distributed over the number or requested columns. You can provoke a column switch using \column.
\startcolumns[n=2]
\input knuth
\column
\input tufte
\stopcolumns
Column balancing fails in "lines" mode (e.g. for poetry).
Paragraphs
Paragraphs are useful in collecting text to be displayed together. For example:
\enableregime[utf]
\defineparagraphs[TwoThird][n=2]
\setupparagraphs[TwoThird][1][width=.66\textwidth]
% The width of the second paragraph is automatically calculated if unspecified.
\startTwoThird
\quotation{...{\it why is there something rather than nothing?}
For nothing is simpler and easier than something.
Furthermore, assuming that things must exist,
one must be able to explain
{\it why they must exist thus,}
and not otherwise.}
\nextTwoThird
G. W. Leibniz, {\it\fr Principes de la nature et de la grâce fondés en raison,} 1714.
\stopTwoThird

See "Paragraphs in Columns" section in the manual for further details.
(Simple)Columns in a narrow frame
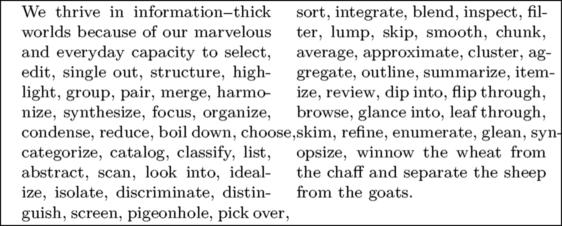
It is hard to put multiple columns in a frame (at least for me), but this one works.
\framed[width=0.9\hsize,location=middle]\bgroup
\startnarrower[2*middle]
\setlocalhsize \hsize\localhsize
\startsimplecolumns
  \input tufte
\stopsimplecolumns
\stopnarrower
\egroup
Another possibility is to use textbackground around the text. (The examples don't work in this wiki because, for security reasons, it has write18 disabled. They should work for you, though, provided that write18 is enabled on your local installation.)
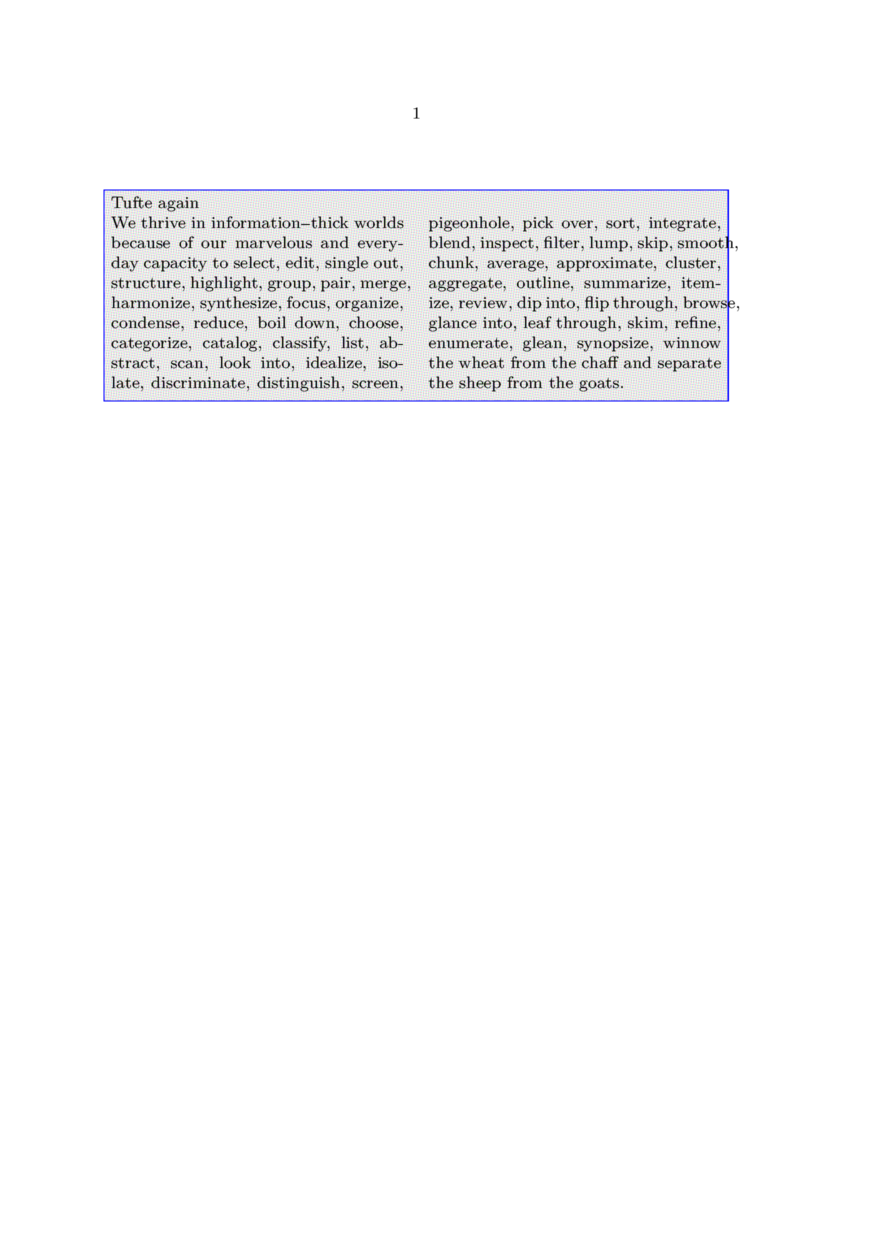
\setupcolors[state=start]
\definetextbackground  [book]
       [state=start, topoffset=.5ex, location=paragraph,
        leftoffset=1ex,bottomoffset=1ex]

\starttextbackground[book]
  Tufte again
  \startcolumns[n=2]
    \input tufte
  \stopcolumns
\stoptextbackground
Column Sets
An alternative method of typesetting text into columns uses columnsets. This method offers more possibilities than simple columns, in particular in placing floats such as figures and in creating columnspans. See Columns manual or column sets source for many examples.
If you don't need much more than the "normal" columns, but e.g. "lines" mode, try this:
\definecolumnset[TwoColumns][n=2]

\startcolumnset[TwoColumns]

\startlines % enforce line breaks
Starlight, star bright,
first star I see tonight;
\stoplines

\column

\startlines
I wish I may, I wish I might
have the wish I wish tonight.
\stoplines

\stopcolumnset

For more details (layout grid features, spreads, different column widths etc.) please refer to the manual!
Vertical lines between columnsets (rules)
Sometimes it is required to have a vertical line between the columns of your columnset. This code draws MetaPost lines in the right place (note that it uses textbackground):
\startuseMPgraphic{verticalline}
    for i=1 upto NOfTextColumns-1 :
        draw (rightboundary TextColumns[i]) shifted (2.5mm,0) shifted -\MPxy\textanchor ;
    endfor ;
    setbounds currentpicture to OverlayBox ;
\stopuseMPgraphic

\defineoverlay[verticalline][\useMPgraphic{verticalline}]
\setupbackgrounds[text][background=verticalline]
\definecolumnset[example][n=3,distance=5mm]
\setupcolumnset[example][1,2][balance=yes]

\starttext
\chapter{Chapter One}
\startcolumnset[example]
\starttextbackground[text] \dorecurse {10}{\input knuth} \stoptextbackground
\stopcolumnset
\stoptext
Streams
From the [announcement mail] by Thomas Schmitz:
We have streams for even and odd pages that can be synchronized at certain points. This is useful for, e.g., typesetting bilingual books: have the original on the even pages, the translation on the odd pages, and synchronize at certain points.
For details see streams module source
The module provides a rather low-lever interface. Hans suggested some handy shortcuts:
\usemodule[streams]

\def\StartCouple{\page\SwitchToNormal}
\def\StopCouple {\SwitchToNormal \SynchronizeLeftAndRight \FlushLeftAndRight}
\def\Original {\SwitchToNormal\SynchronizeLeftAndRight\SwitchToLeft}
\def\Translation{\SwitchToRight}

\Original\en
Are you sleeping, brother John?

\Translation\de
Bruder Jakob, schläfst du noch?
So you put the part of your document where synchronization should take place between \StartCouple and \StopCouple. After that , \Original and \Translation switches between even and odd pages.
Beware, streams don't work in columns and not very good in columnsets.
 |
TODO: We need documentation and samples for Paragraphs, Streams and Column Sets (See: To-Do List) |
Floats and other limitations of columns
Columns and one-column floats don't work well together in TeX. It seems that you can't have a float that spans one column automatically put at the top or the bottom and have the columns balanced automatically at the end. Neither ConTeXt nor LaTeX can do it in a automatized way (like with floats that span more than a column). Here you have some tricks to make it work more or less:
Columnsets
With columnsets you can put floats that span one, two or any number of columns and in any position (top, bottom, middle of the text). The price for this is that you have to balance the columns manually at the end (see Columnset manual).
Columnsets have a limitation, however: they are very strongly grid-based, and you can't change the interlinespace within the columnset (e.g., if some paragraphs are typed in a smaller font). You can change the interlinespace if the entire text with a smaller interlinespace fits in one column, like a float or a section title (putting it between \startlinecorrection\stoplinecorrection), but if the text with a smaller interlinespace starts in one column and has to continue in the following one, nothing will work, and the layout will be completely messed.
Changing the font weight or shape inbetween \startcolumnset and \stopcolumnset may cause some columns to be shifted vertically. Then you must use \restoreinterlinespace after the font switch (\bf, \ss) to correct the interline spacing. See [1].
So, if you want columns and one-column floats and don't have to change the interlinespacing, use Columnsets. If not, you can use Columns with some tricks.
Columns and Floats
With Columns you have the columns automatically balanced at the end, but only certain floats are "officially" supported:
- Floats that span more than a column at the top of the following page
- Floats that span one column in the middle of the text, accidentally at the top of the following page
Here, the optional argument placefloat[here, top, bottom, etc.] does nothing. When you place a float, if its width is larger than the column width (\textwidth), that float will be automatically put at the top of the following page, spanning the columns needed. If its width is shorter than the column width, the float will be put in the middle of the text, spanning one column. If there is not enough space left in the column, it will float until the top of the following column. You can use this method to put floats at the top of a column, but it's not recommended, because it is tedious and if you change the text before the float, you will probably find it then in the middle of the column.
There is a semi-automatic way to put:
- Floats that span one column at the top of the left column of a page
- Any float in a separated page, without text
with the possibility of changing the text and having the float always correctly put, like with "officially" supported floats, using \startpostponing\stoppostponing. Everything that goes into this environment will be put at the beginning of the next page, or in the page indicated in the optional argument (e.g., \startpostponing[34]; see this wiki entry). If we write
\startpostponing[35]
\vbox{\vskip-\baselineskip
\placefigure{caption}{\externalfigure[file][width=\textwidth]}
}
\stoppostponing
the figure will be put at the top of the first column at page 35, or four pages further on, if we put [+4], or on the following page, with no optional argument. The figure has to be enclosed in a box, or the grid will be broken. Putting the figure in a box lowers it a line (why?), so it has to be corrected with the \vskip-\baselineskip.
You can put more than a float in the same column, but they have to be into the same box, or the grid will be broken
\startpostponing
\vbox{\vskip-\baselineskip
\placefigure{caption}{\externalfigure[file][width=\textwidth]}
\placefigure{caption2}{\externalfigure[file2][width=\textwidth]}
}
\stoppostponing
With this method you can put a float in a separated page, without any text
\startpostponing[+5]
\vbox{
\placefigure{caption}{\externalfigure[file][width=\makeupwidth]}
}
\page
\stoppostponing
And you can use it to put a float that span more than a column in a page other than the one chosen by the algorithm (without \vbox):
\startpostponing[67]
\placefigure{caption}{\externalfigure[file][width=\makeupwidth]}
\stoppostponing
This has some limitations, too. If you put a float at the top of a column and there is another float that spans more than a column over all, the grid will be broken, so you have to put it in another page, but you can put more than one float of the same type together, as seen above.