Difference between revisions of "Titles"
(blank pages with front, body, back matters and appendices) |
(Make all examples narrower, turn tables into wikitables, kill some <cmd> tags, and improve a few sentences.) |
||
| Line 5: | Line 5: | ||
Titles define the structure of your document. Decide yourself, how deep you want to nest them: | Titles define the structure of your document. Decide yourself, how deep you want to nest them: | ||
| − | + | {| class=wikitable | |
| − | + | ! Numbered !! Unnumbered | |
| − | + | |- | |
| − | + | | {{cmd|part}} || — | |
| − | + | |- | |
| − | + | | {{cmd|chapter}} || {{cmd|title}} | |
| − | + | |- | |
| − | + | | {{cmd|section}} || {{cmd|subject}} | |
| − | + | |- | |
| − | + | | {{cmd|subsection}} || {{cmd|subsubject}} | |
| − | + | |- | |
| − | + | | {{cmd|subsubsection}} || {{cmd|subsubsubject}} | |
| − | + | |- | |
| − | + | | ... || ... | |
| − | + | |} | |
| − | |||
| − | |||
| − | |||
| − | |||
| − | |||
| − | |||
| − | |||
| − | |||
| − | |||
| − | |||
| − | |||
| − | |||
| − | |||
| − | |||
| − | |||
| − | The | + | The unnumbered versions don't appear in a table of contents! To change that, see the section on[[#Unnumbered_titles_in_table_of_contents|Unnumbered titles in the table of contents]]. |
| − | |||
| − | |||
| − | Also note that in the front matter of the document, all titles are unnumbered | + | Also note that in the front matter of the document, all titles are unnumbered by default. The titles from the 'numbered' category still show up in the table of contents, though, and the titles from the 'unnumbered' category still don't. |
| − | by default. | ||
| − | |||
===Referencing Titles=== | ===Referencing Titles=== | ||
| Line 58: | Line 39: | ||
\at{page}[hasselt-by-night]. | \at{page}[hasselt-by-night]. | ||
| − | (see | + | (see {{cmd|at}}) |
</texcode> | </texcode> | ||
| Line 66: | Line 47: | ||
==Titling Style== | ==Titling Style== | ||
| − | see | + | see {{cmd|setuphead}} and some enhanced samples below. |
A FAQ is, how to get a line under the pageheader: | A FAQ is, how to get a line under the pageheader: | ||
| Line 89: | Line 70: | ||
<texcode> | <texcode> | ||
| − | \setuphead[chapter][align={flushleft, nothyphenated, verytolerant}] | + | \setuphead[chapter][align={flushleft, nothyphenated, verytolerant}] |
</texcode> | </texcode> | ||
| Line 95: | Line 76: | ||
If you want you may have colors on your document's chapters or sections. | If you want you may have colors on your document's chapters or sections. | ||
| − | To do that you should use | + | To do that you should use {{cmd|setuphead}}. Take a look at the following |
example: | example: | ||
| Line 152: | Line 133: | ||
</texcode> | </texcode> | ||
| − | A new header | + | A new header {{cmd|myheader}} is defined and it inherits the properties |
| − | of | + | of {{cmd|section}} (title, subject, whatever). You can ''define'' several |
headers at once! | headers at once! | ||
| − | ==Formatting Titles with | + | ==Formatting Titles with {{cmd|setuphead}}== |
| − | + | The following parameters to {{cmd|setuphead}} change the style of | |
| − | the heading. | + | the heading. |
| − | + | {| class=wikitable | |
| − | + | |- | |
| − | + | ! Text !! Number | |
| − | + | |- | |
| − | + | | textstyle | |
| − | + | | numberstyle | |
| − | + | |- | |
| − | + | | textcommand | |
| − | + | | numbercommand | |
| − | + | |- | |
| − | + | | deeptextcommand | |
| − | + | | deepnumbercommand | |
| − | + | |- | |
| − | + | |} | |
| − | |||
| − | |||
| − | |||
| − | |||
| − | Quite obviously, the number | + | Quite obviously, the number commands work on the chapter/section/etc. number, |
their text counterparts change the text itself. However, there are differences | their text counterparts change the text itself. However, there are differences | ||
between <tt>style</tt>, <tt>command</tt> and <tt>deepcommand</tt>. | between <tt>style</tt>, <tt>command</tt> and <tt>deepcommand</tt>. | ||
The <tt>style</tt> variants accept a style (<tt>bold</tt>, <tt>cap</tt>, etc.) | The <tt>style</tt> variants accept a style (<tt>bold</tt>, <tt>cap</tt>, etc.) | ||
| − | or a font switch ( | + | or a font switch ({{cmd|em}}, {{cmd|tfx}}, etc). <tt>textstyle</tt> prepends |
the text with the associated style. <tt>textcommand</tt> is a command name which | the text with the associated style. <tt>textcommand</tt> is a command name which | ||
is given the text (with all markup) as a parameter. <tt>deeptextcommand</tt> is | is given the text (with all markup) as a parameter. <tt>deeptextcommand</tt> is | ||
similar to <tt>textcommand</tt> but it acts only on the text (not on the markup). | similar to <tt>textcommand</tt> but it acts only on the text (not on the markup). | ||
| − | So, if we have | + | So, if we have {{cmd|title|2={A story}}}, the different parameters have the following results: |
| − | + | {| | |
| − | + | |- | |
| − | + | | textstyle=\em | |
| − | + | | => | |
| − | + | | \em A story | |
| − | + | |- | |
| − | + | | textstyle=\em, textcommand=\uppercase | |
| − | + | | => | |
| − | + | | \uppercase{\em A story} | |
| − | + | | => | |
| − | + | | \em A STORY | |
| − | + | |- | |
| − | + | | textstyle=\em, deeptextcommand=\uppercase | |
| − | + | | => | |
| − | + | | \em\uppercase{A story} | |
| − | + | | => | |
| − | + | | \em A STORY | |
| − | + | |- | |
| − | + | |} | |
| − | |||
| − | |||
What is the difference between <tt>textcommand</tt> and <tt>deeptextcommand</tt>, | What is the difference between <tt>textcommand</tt> and <tt>deeptextcommand</tt>, | ||
| Line 220: | Line 195: | ||
it wreaks havoc with markup: | it wreaks havoc with markup: | ||
| − | + | {| | |
| − | + | |- | |
| − | + | | textstyle=\em, textcommand=\WORD | |
| − | + | | => | |
| − | + | | \WORD{\em A story} | |
| − | + | | => | |
| − | + | | \EM A STORY | |
| − | + | |- | |
| − | + | | textstyle=\em, deeptextcommand=\WORD | |
| − | + | | => | |
| − | + | | \em\WORD{A story} | |
| − | + | | => | |
| − | + | | \em A STORY | |
| − | + | |- | |
| − | + | |} | |
| − | |||
In this case using <tt>deeptextcommand</tt> is the correct solution for capitalizing | In this case using <tt>deeptextcommand</tt> is the correct solution for capitalizing | ||
| − | headers. (Using | + | headers. (Using {{cmd|uppercase}} works in this specific case, but only if you stick |
to Latin 1 or Anglo-Saxon characters. Other languages will suffer from lowercase accented | to Latin 1 or Anglo-Saxon characters. Other languages will suffer from lowercase accented | ||
characters, like CAFé.) | characters, like CAFé.) | ||
| − | Use | + | Use {{cmd|setuphead}}<tt>[part][conversion=Romannumerals]</tt>, for example, to employ an |
alternative numbering scheme. | alternative numbering scheme. | ||
=== Truly empty pagebreak before chapters === | === Truly empty pagebreak before chapters === | ||
| − | Using | + | Using {{cmd|setuppagenumbering|2=[alternative=doublesided]}} makes the chapters start |
on the right page. However, the blank page is not truely empty, it contains headers and | on the right page. However, the blank page is not truely empty, it contains headers and | ||
footers. To get truely empty pages, use the following | footers. To get truely empty pages, use the following | ||
| Line 284: | Line 258: | ||
* You define a new pagebreak rule. It has the name <code>mychapterpagebreak</code>. The options set read as: <code>pagebreak=yes</code>, placeheader, use a right page. | * You define a new pagebreak rule. It has the name <code>mychapterpagebreak</code>. The options set read as: <code>pagebreak=yes</code>, placeheader, use a right page. | ||
* You set options for the header of type chapter and use for the option page the afore defined new pagebreak. | * You set options for the header of type chapter and use for the option page the afore defined new pagebreak. | ||
| − | * You might want to experiment with the commented lines and see what happens. For example, the | + | * You might want to experiment with the commented lines and see what happens. For example, the {{cmd|setupsectionblock}} commands will give a truly blank page (if needed) after the specified {{code|1=stop*part}} command. |
==== When using front, body, back matters and appendices ==== | ==== When using front, body, back matters and appendices ==== | ||
| − | As Wolfgang explained on the mailing list, when using | + | As Wolfgang explained on the mailing list, when using {{code|1=*frontmatter}}, {{code|1=*bodymatter}}, {{code|1=*backmatter}} and {{code|1=*appendices}}, you need to remove the page they create to get the page before a new chapter or part with no headers and footers. |
<texcode> | <texcode> | ||
| Line 333: | Line 307: | ||
Sometimes one wants an unnumbered chapter, say introduction, the following might do that trick: | Sometimes one wants an unnumbered chapter, say introduction, the following might do that trick: | ||
| − | < | + | <context source=yes> |
| − | \ | + | \setuppapersize[A5] |
| − | |||
| − | |||
| − | |||
| − | |||
| − | |||
| − | |||
| − | |||
| − | |||
| − | |||
| − | |||
| − | |||
| − | |||
| − | |||
| − | |||
| − | |||
| − | |||
\definehead [intro] [chapter] | \definehead [intro] [chapter] | ||
\setuphead [intro] [number=no] | \setuphead [intro] [number=no] | ||
| Line 371: | Line 329: | ||
Note that just putting the introduction in the frontmatter already did the trick for me (on a recent MkIV). | Note that just putting the introduction in the frontmatter already did the trick for me (on a recent MkIV). | ||
| + | |||
| + | An alternative approach: | ||
| + | <texcode> | ||
| + | \setuphead[title][ | ||
| + | incrementnumber=yes, % keep an internal title counter+list | ||
| + | number=no] % don't display the counter | ||
| + | |||
| + | % Manually specify the composition of the section and subsection | ||
| + | % numbers, so subsection 1.1 in the second title won't appear as | ||
| + | % Subsection 2.1.1 | ||
| + | \setuphead[section][sectionsegments=section] | ||
| + | \setuphead[subsection][sectionsegments=section:subsection] | ||
| + | |||
| + | % Redefine the toc list to include titles | ||
| + | \definecombinedlist[content][title, section] | ||
| + | </texcode> | ||
==Your Own Title Styles== | ==Your Own Title Styles== | ||
| − | Sometimes the possibilities of | + | Sometimes the possibilities of {{cmd|setuphead}} aren't enough. You can define |
your own styling commands, as shown in the following examples. | your own styling commands, as shown in the following examples. | ||
| Line 381: | Line 355: | ||
This very simple example shows how to start a title within the margin, rather than at the text's edge | This very simple example shows how to start a title within the margin, rather than at the text's edge | ||
| − | < | + | <context source=yes> |
| − | \ | + | \setuppapersize[A5] |
| − | |||
| − | |||
| − | |||
| − | |||
| − | |||
\setuphead[chapter][alternative=margin] | \setuphead[chapter][alternative=margin] | ||
| Line 396: | Line 365: | ||
===Chapter titles in new line=== | ===Chapter titles in new line=== | ||
| − | To have the chapter title simply in a new line a new command needs to be defined that takes care of this. It needs to be wrapped in | + | To have the chapter title simply in a new line a new command needs to be defined that takes care of this. It needs to be wrapped in {{cmd|framed}}. |
| − | |||
| − | |||
| − | |||
| − | |||
| − | |||
| − | |||
| − | |||
| − | |||
| − | |||
| − | |||
| − | |||
| − | |||
| − | |||
| − | <context> | + | <context source=yes> |
| + | \setuppapersize[A5] | ||
\setuplabeltext [en] [chapter=Chapter~] | \setuplabeltext [en] [chapter=Chapter~] | ||
\define[2]\MyChapter | \define[2]\MyChapter | ||
| Line 423: | Line 380: | ||
This example illustrates expanded chapter titles. | This example illustrates expanded chapter titles. | ||
| − | < | + | <context source=yes> |
| − | \ | + | \setuppapersize[A5] |
| − | |||
| − | |||
| − | |||
| − | |||
| − | |||
| − | |||
| − | |||
| − | |||
| − | |||
| − | |||
| − | |||
\def\MyChapterCommand#1#2% | \def\MyChapterCommand#1#2% | ||
{\framed[frame=off,bottomframe=on,topframe=on] | {\framed[frame=off,bottomframe=on,topframe=on] | ||
| Line 472: | Line 418: | ||
===A complex graphical element under the chapter title=== | ===A complex graphical element under the chapter title=== | ||
| − | < | + | <context source=yes> |
| − | \ | + | \setuppapersize[A6] |
| − | |||
| − | |||
| − | |||
| − | |||
| − | |||
| − | |||
| − | |||
| − | |||
| − | |||
| − | |||
| − | |||
| − | |||
| − | |||
| − | |||
| − | |||
| − | |||
| − | |||
| − | |||
| − | |||
| − | |||
| − | |||
| − | |||
| − | |||
| − | |||
| − | |||
| − | |||
| − | |||
| − | |||
| − | |||
| − | |||
| − | |||
| − | |||
| − | |||
| − | |||
| − | |||
| − | |||
| − | |||
| − | |||
| − | |||
| − | |||
| − | |||
| − | |||
| − | |||
| − | |||
\setupcolors[state=start] | \setupcolors[state=start] | ||
\startuseMPgraphic{HeaderDeco} | \startuseMPgraphic{HeaderDeco} | ||
| Line 566: | Line 468: | ||
This is achieved by the following setup: | This is achieved by the following setup: | ||
| − | < | + | <context source=yes> |
| − | \ | + | \setuppapersize[A5] |
| − | |||
| − | |||
| − | |||
| − | |||
| − | |||
| − | |||
| − | |||
| − | |||
| − | |||
\setuphead | \setuphead | ||
[subject] | [subject] | ||
| Line 586: | Line 479: | ||
\subject{First Subject} | \subject{First Subject} | ||
| − | + | \input weisman | |
| − | |||
| − | |||
| − | |||
\subject{Second Subject} | \subject{Second Subject} | ||
| − | + | \input ward | |
| − | |||
| − | |||
| − | |||
\stoptext | \stoptext | ||
</context> | </context> | ||
| − | See | + | See [http://www.ntg.nl/pipermail/ntg-context/2003/002053.html the mailing list thread] for more on this. |
===Headings numbered independent of chapters or other headings=== | ===Headings numbered independent of chapters or other headings=== | ||
| Line 678: | Line 565: | ||
===Chapter headers=== | ===Chapter headers=== | ||
| − | + | This is an example of chapter headings with an enlarged shadow behind them, based on [http://archive.contextgarden.net/message/20041020.100630.d531bb1d.en.html 20/10/2004 a solution by Hans]. | |
| − | |||
| − | |||
| − | |||
| − | |||
| − | |||
| − | |||
| − | |||
| − | |||
| − | |||
| − | |||
| − | |||
| − | |||
| − | |||
| − | |||
| − | |||
| − | |||
| − | |||
| − | |||
| − | |||
| − | |||
| − | |||
| − | |||
| − | |||
| − | |||
| − | |||
| − | |||
| − | |||
| − | |||
| − | |||
| − | |||
| − | \ | + | <context source=yes> |
| + | \setuppapersize[A5] | ||
| − | |||
| − | |||
| − | |||
| − | |||
| − | |||
| − | |||
| − | |||
| − | |||
| − | |||
| − | |||
| − | |||
| − | |||
| − | |||
| − | |||
| − | |||
\useencoding[ffr] | \useencoding[ffr] | ||
\mainlanguage[fr] | \mainlanguage[fr] | ||
| − | |||
| − | |||
| − | |||
| − | |||
| − | |||
| − | |||
\setupcolors[state=start] | \setupcolors[state=start] | ||
| Line 756: | Line 593: | ||
\chapter[chap:ques]{Question} | \chapter[chap:ques]{Question} | ||
| − | |||
| − | |||
| − | |||
| − | |||
| − | |||
| − | |||
| − | |||
\stoptext | \stoptext | ||
</context> | </context> | ||
| Line 771: | Line 601: | ||
<context source="yes"> | <context source="yes"> | ||
| + | \setuppapersize[A5] | ||
\setupexternalfigures[location=default] % needed only for the wiki to the find the figure | \setupexternalfigures[location=default] % needed only for the wiki to the find the figure | ||
| − | \useexternalfigure[ | + | \useexternalfigure[section-1][cow][width=5cm,height=1cm] |
| − | \useexternalfigure[ | + | \useexternalfigure[section-2][mill.png][width=5cm,height=1cm] |
\setuphead | \setuphead | ||
| − | [ | + | [section] |
| − | [command=\ | + | [command=\MySectionCommand] |
| + | \setuphead | ||
| + | [subsection] | ||
| + | [command=] | ||
| − | \def\ | + | \def\MySectionCommand#1#2% |
| − | {\externalfigure[ | + | {\externalfigure[section-\currentheadnumber]} |
\starttext | \starttext | ||
| − | \ | + | \section{One} |
| − | \ | + | \subsection{First subsection of Section One} |
| − | \ | + | \section{Two} |
\stoptext | \stoptext | ||
| Line 810: | Line 644: | ||
[http://archive.contextgarden.net/message/20050519.215526.df7c5cd1.html] | [http://archive.contextgarden.net/message/20050519.215526.df7c5cd1.html] | ||
| − | Users of MkIV can safely rely on <tt>command</tt> and don't have to | + | Users of MkIV can safely rely on <tt>command</tt> and don't have to bother with the <tt>deep...command</tt> variants. However, {{cmd|currentheadnumber}} does not seem to return anything but 0. Thus, the following code is required to define <tt>\MyChapterCommand</tt> when using MkIV: |
| − | bother with the <tt>deep...command</tt> variants. However, | ||
| − | |||
| − | Thus, the following code is required to define | ||
| − | <tt>\MyChapterCommand</tt> when using MkIV: | ||
<texcode> | <texcode> | ||
| Line 824: | Line 654: | ||
===Chapter head with absolute positioning of following text=== | ===Chapter head with absolute positioning of following text=== | ||
| − | |||
| − | |||
| − | |||
| − | |||
| − | |||
| − | |||
| − | |||
No matter how many lines the chapter head runs to, the text will always start, e.g. 4cm below the top of the heading: | No matter how many lines the chapter head runs to, the text will always start, e.g. 4cm below the top of the heading: | ||
| − | <context | + | <context source=yes> |
| − | |||
| − | |||
| − | |||
| − | |||
| − | |||
| − | |||
| − | |||
| − | |||
| − | |||
| − | |||
| − | |||
| − | |||
| − | |||
| − | |||
| − | |||
| − | |||
| − | |||
| − | |||
| − | |||
| − | |||
| − | |||
| − | |||
| − | |||
| − | |||
| − | |||
| − | |||
| − | |||
| − | |||
\setuppapersize[A6][A6] | \setuppapersize[A6][A6] | ||
\setupbodyfont[8pt] | \setupbodyfont[8pt] | ||
| Line 870: | Line 665: | ||
\vss | \vss | ||
\egroup} | \egroup} | ||
| − | \setuphead[chapter][header=nomarking,command=\MyChapterCommand] | + | \setuphead[chapter][header=nomarking, command=\MyChapterCommand] |
\starttext | \starttext | ||
\chapter{test} \input tufte | \chapter{test} \input tufte | ||
| Line 882: | Line 677: | ||
Hans came up with this cleverness, showing two alternate ways of doing it: | Hans came up with this cleverness, showing two alternate ways of doing it: | ||
| − | <context source="yes | + | <context source="yes"> |
| + | \setuppapersize[A5] | ||
| + | |||
| + | % ---- First solution ---- | ||
| + | |||
\def\FirstSolution#1#2% | \def\FirstSolution#1#2% | ||
{\vbox\bgroup | {\vbox\bgroup | ||
| Line 904: | Line 703: | ||
\blackrule[width=\scratchdimen,height=1pt] | \blackrule[width=\scratchdimen,height=1pt] | ||
\egroup} | \egroup} | ||
| + | |||
| + | % ---- Second solution ---- | ||
\doglobal\newcounter\NextLinePos | \doglobal\newcounter\NextLinePos | ||
| Line 922: | Line 723: | ||
\def\DoSecondSolution#1% | \def\DoSecondSolution#1% | ||
{\bpos{npl:\NextLinePos}#1\epos{npl:\NextLinePos}} | {\bpos{npl:\NextLinePos}#1\epos{npl:\NextLinePos}} | ||
| + | |||
| + | % ---- Trying it out solution ---- | ||
% \showstruts | % \showstruts | ||
| + | \starttext | ||
\setuphead[section][command=\FirstSolution] | \setuphead[section][command=\FirstSolution] | ||
| − | + | \section{is this nice or not} | |
| − | + | \section{is this nice or not nice, that's the question} | |
| − | |||
| − | \section{is this nice or not} | ||
| − | |||
| − | \section{is this nice or not nice, that's the question} | ||
\setuphead[section][command=\SecondSolution,deeptextcommand=\DoSecondSolution] | \setuphead[section][command=\SecondSolution,deeptextcommand=\DoSecondSolution] | ||
| − | + | \section{is this nice or not} | |
| − | \section{is this nice or not} | + | \section{is this nice or not nice, that's the question} |
| − | |||
| − | \section{is this nice or not nice, that's the question} | ||
| − | |||
\stoptext | \stoptext | ||
</context> | </context> | ||
| − | As if that wasn't enough, Taco pointed out that | + | As if that wasn't enough, Taco pointed out that {{cmd|lastlinewidth}} |
is the easy route to finding the width of the last line. Use something like: | is the easy route to finding the width of the last line. Use something like: | ||
| − | < | + | <texcode> |
\optimizedisplayspacingtrue\setlastlinewidth % core-mat macro | \optimizedisplayspacingtrue\setlastlinewidth % core-mat macro | ||
\global\advance\lastlinewidth-\hangindent\par % adjust | \global\advance\lastlinewidth-\hangindent\par % adjust | ||
\blackrule[width=\lastlinewidth,height=1pt] | \blackrule[width=\lastlinewidth,height=1pt] | ||
| − | </ | + | </texcode> |
=== Flushing section head data without typesetting them in the text === | === Flushing section head data without typesetting them in the text === | ||
| − | The following is probably a very special case. Hoever suppose you need to place section information like the title e.g. in the topspace area. You want that the section is still displayed in the TOC, but you do not want that at the spot where | + | The following is probably a very special case. Hoever suppose you need to place section information like the title e.g. in the topspace area. You want that the section is still displayed in the TOC, but you do not want that at the spot where {{cmd|startsection|2=[title=...,list=...]}} resides there is any trace of it. The command to be used to hide the section title is: |
<texcode> | <texcode> | ||
| Line 967: | Line 764: | ||
</texcode> | </texcode> | ||
| − | What happens is that the information in the | + | What happens is that the information in the {{cmd|startsection|2=[title=...,list=...]}} command is passed to the texttexts, which are flushed at every page. In order to see when it is flushed you might place e.g. !!! in front of the {{cmd|placerawheaddata|2=[section]}}. |
The result is a complete TOC without any trace of the section heading in the text. | The result is a complete TOC without any trace of the section heading in the text. | ||
| Line 1,013: | Line 810: | ||
\stoptext | \stoptext | ||
| − | |||
</texcode> | </texcode> | ||
| Line 1,019: | Line 815: | ||
[[Category:Graphics]] | [[Category:Graphics]] | ||
[[Category:Text elements]] | [[Category:Text elements]] | ||
| + | table> | ||
| + | /td> | ||
Revision as of 18:00, 8 July 2012
< Structurals | Visuals >
Contents
- 1 Default
- 2 Titling Style
- 3 Titling Alignment
- 4 Using colors in chapters and sections
- 5 Your Own Titling Levels
- 6 Formatting Titles with \setuphead
- 7 Independent Section Numbering
- 8 Unnumbered titles in table of contents
- 9 Your Own Title Styles
- 9.1 Start the title in the margin
- 9.2 Chapter titles in new line
- 9.3 Expanded chapter titles
- 9.4 Exercise numbers
- 9.5 A complex graphical element under the chapter title
- 9.6 Titles in margin
- 9.7 Headings numbered independent of chapters or other headings
- 9.8 Chapter headers
- 9.9 Figures in Headings
- 9.10 Chapter head with absolute positioning of following text
- 9.11 Section head with underlining to width of last line
- 9.12 Flushing section head data without typesetting them in the text
Default
Titles define the structure of your document. Decide yourself, how deep you want to nest them:
| Numbered | Unnumbered |
|---|---|
| \part | — |
| \chapter | \title |
| \section | \subject |
| \subsection | \subsubject |
| \subsubsection | \subsubsubject |
| ... | ... |
The unnumbered versions don't appear in a table of contents! To change that, see the section onUnnumbered titles in the table of contents.
Also note that in the front matter of the document, all titles are unnumbered by default. The titles from the 'numbered' category still show up in the table of contents, though, and the titles from the 'unnumbered' category still don't.
Referencing Titles
Every heading command can take an optional parameter as reference:
\title[hasselt-by-night]{Hasselt by night}
The bracket pair is optional and used for internal References. If you want to refer to this header you type for example
\at{page}[hasselt-by-night].

(see {{cmd|at}})
Note that reference labels are limited to ASCII characters in traditional TeX. This limitation has been removed in ConTeXt mkiv.
Titling Style
see \setuphead and some enhanced samples below.
A FAQ is, how to get a line under the pageheader:
\setupheader[after=\hrule]
To make the section numbers appear as characters, do
\setupsection[section-3][bodypartconversion=Character]
The section-3 corresponds to section. Similarly,
section-1 corresponds to part, section-2
corresponds to chapter and so on.
Titling Alignment
Titles should often be left aligned without hyphenation. Try this:
\setuphead[chapter][align={flushleft, nothyphenated, verytolerant}]
Using colors in chapters and sections
If you want you may have colors on your document's chapters or sections. To do that you should use \setuphead. Take a look at the following example:
\setupcolors[state=start] % Important. You won't have colors without it.

\setuphead[chapter][header=empty] % Chapter pages won't have headers

\setupheadertexts[][chapter]      %  The header will be the chapter's name

\starttext

\completecontent

\chapter{Black chapter 1}

\setuphead[section][color=darkcyan]  % This is how you change your chapter's color.

\section{Dark cyan section 1.1}

\page
Test.

\setuphead[chapter][color=darkgreen]

\chapter{Dark green chapter}

\page
Test.

\setuphead[chapter][color=red]

\chapter{Red chapter}

\page
Test.

\stoptext
Your Own Titling Levels
Of course you can define your own titling commands and probably must adapt the default settings.
\definehead[myheader][section]

\setuphead
  [myheader]
  [numberstyle=bold,
   textstyle=cap,
   before=\hairline\blank,
   after=\nowhitespace\hairline]

\myheader[hasselt-ref]{Hasselt makes headlines}
A new header \myheader is defined and it inherits the properties of \section (title, subject, whatever). You can define several headers at once!
Formatting Titles with \setuphead
The following parameters to \setuphead change the style of the heading.
| Text | Number |
|---|---|
| textstyle | numberstyle |
| textcommand | numbercommand |
| deeptextcommand | deepnumbercommand |
Quite obviously, the number commands work on the chapter/section/etc. number, their text counterparts change the text itself. However, there are differences between style, command and deepcommand.
The style variants accept a style (bold, cap, etc.) or a font switch (\em, \tfx, etc). textstyle prepends the text with the associated style. textcommand is a command name which is given the text (with all markup) as a parameter. deeptextcommand is similar to textcommand but it acts only on the text (not on the markup).
So, if we have \title{A story}, the different parameters have the following results:
| textstyle=\em | => | \em A story | ||
| textstyle=\em, textcommand=\uppercase | => | \uppercase{\em A story} | => | \em A STORY |
| textstyle=\em, deeptextcommand=\uppercase | => | \em\uppercase{A story} | => | \em A STORY |
What is the difference between textcommand and deeptextcommand, then? With this example there is very little difference, as uppercase knows how to handle markup. Sometimes this is not the case. For example, an almost similar command WORD is not compatible with textcommand, because it wreaks havoc with markup:
| textstyle=\em, textcommand=\WORD | => | \WORD{\em A story} | => | \EM A STORY |
| textstyle=\em, deeptextcommand=\WORD | => | \em\WORD{A story} | => | \em A STORY |
In this case using deeptextcommand is the correct solution for capitalizing headers. (Using \uppercase works in this specific case, but only if you stick to Latin 1 or Anglo-Saxon characters. Other languages will suffer from lowercase accented characters, like CAFé.)
Use \setuphead[part][conversion=Romannumerals], for example, to employ an alternative numbering scheme.
Truly empty pagebreak before chapters
Using \setuppagenumbering[alternative=doublesided] makes the chapters start on the right page. However, the blank page is not truely empty, it contains headers and footers. To get truely empty pages, use the following
\definepagebreak
  [mychapterpagebreak]
  [yes,header,right]
 %[yes,header,left]
 %[yes,header,footer,right]

\setuphead
  [chapter]
  [page=mychapterpagebreak]
 %[page=Mychapterpagebreak,header=empty,footer=empty]

%\setupsectionblock[frontpart][page=chapter]
%\setupsectionblock[bodypart][page=chapter]
%\setupsectionblock[backpart][page=chapter]
%\setupsectionblock[appendix][page=chapter]

\setuppagenumbering[alternative=doublesided,location={header,margin}]
\setupheadertexts[{My special headertext}]
\setupfootertexts[This is a text in the footer]
%\setupbackgrounds[header][text][bottomframe=on]

\starttext
  \chapter{testA} \dorecurse{10}{\input tufte }
  \chapter{testB} \dorecurse{10}{\input tufte }
  \chapter{testC} \dorecurse{10}{\input tufte }
\stoptext
Explanation (provided by Willi Egger on the mailing list)
- You define a new pagebreak rule. It has the name
mychapterpagebreak. The options set read as:pagebreak=yes, placeheader, use a right page. - You set options for the header of type chapter and use for the option page the afore defined new pagebreak.
- You might want to experiment with the commented lines and see what happens. For example, the \setupsectionblock commands will give a truly blank page (if needed) after the specified
stop*partcommand.
When using front, body, back matters and appendices
As Wolfgang explained on the mailing list, when using *frontmatter, *bodymatter, *backmatter and *appendices, you need to remove the page they create to get the page before a new chapter or part with no headers and footers.
\setupsectionblock[frontpart][page=]
\setupsectionblock[bodypart] [page=]
\setupsectionblock[backpart] [page=]
\setupsectionblock[appendix] [page=]
\definepagebreak[firstpagebreak][yes,header,footer,right]
\setuphead[chapter][page=firstpagebreak]
\setuppagenumbering[alternative=doublesided]
\starttext
\startfrontmatter
\chapter{front}
\stopfrontmatter
\startbodymatter
\chapter{body}
\stopbodymatter
\startappendices
\chapter{appendix}
\stopappendices
\startbackmatter
\chapter{back}
\stopbackmatter
\stoptext
Independent Section Numbering
If you want section numbering to be independent of chapter numbering, use
\setuphead   [chapter][resetnumber=no]
\setupsection[section][previousnumber=no]
This is handled differently in mkiv (where "resetnumber=no" is silently ignored):
\definestructureresetset[default][1,1,0][1] % reset part, chapter, but not section
\setuphead[sectionresetset=default]
Unnumbered titles in table of contents
Sometimes one wants an unnumbered chapter, say introduction, the following might do that trick:
\setuppapersize[A5]

\definehead     [intro] [chapter]
\setuphead      [intro] [number=no]

\definecombinedlist     [content][intro,chapter,section]
\setuplist      [intro] [headnumber=no]

\starttext
\completecontent
\startfrontmatter
\intro{No number}
\stopfrontmatter

\startbodymatter
\chapter{Has number}
\stopbodymatter
\stoptext
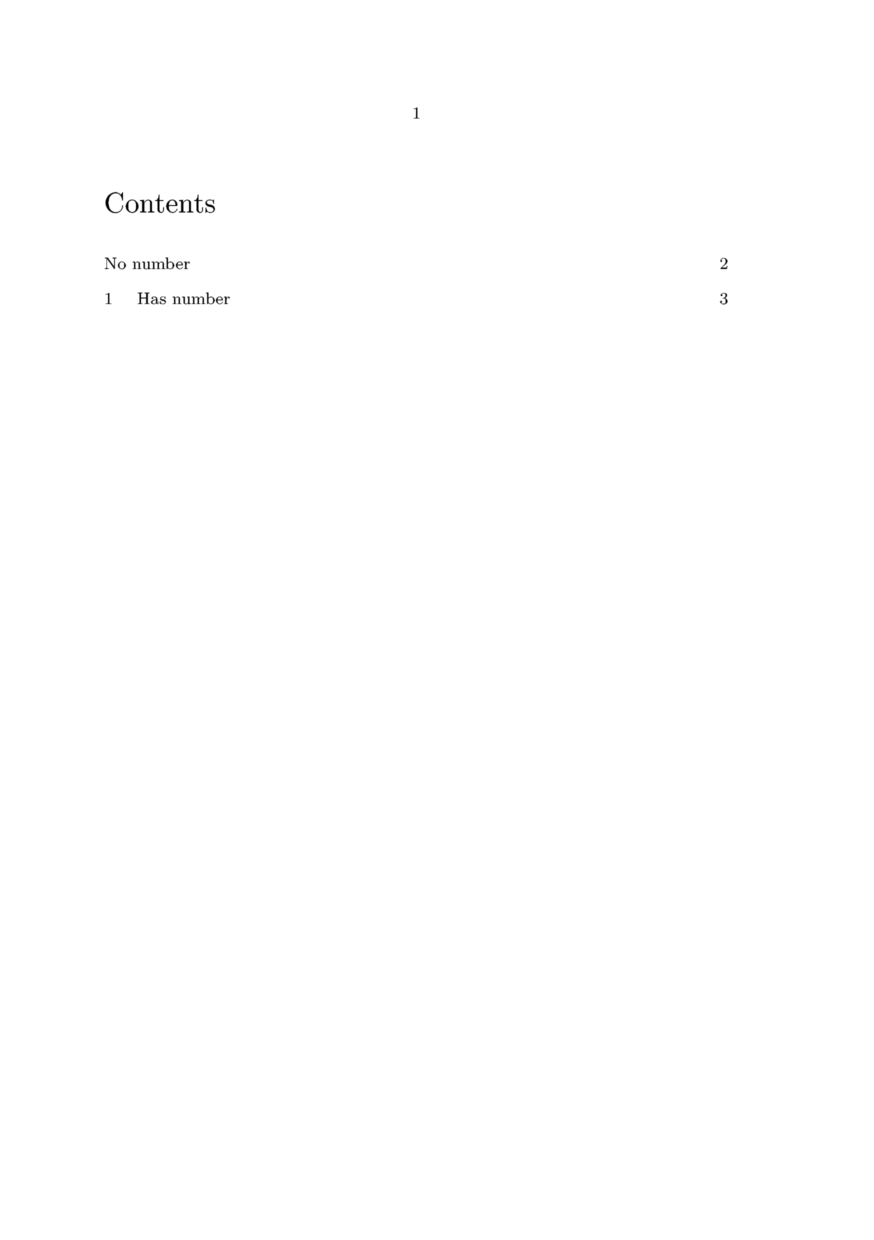
Note that just putting the introduction in the frontmatter already did the trick for me (on a recent MkIV).
An alternative approach:
\setuphead[title][
    incrementnumber=yes, % keep an internal title counter+list
    number=no]           % don't display the counter

% Manually specify the composition of the section and subsection
% numbers, so subsection 1.1 in the second title won't appear as
% Subsection 2.1.1
\setuphead[section][sectionsegments=section]
\setuphead[subsection][sectionsegments=section:subsection]

% Redefine the toc list to include titles
\definecombinedlist[content][title, section]
Your Own Title Styles
Sometimes the possibilities of \setuphead aren't enough. You can define your own styling commands, as shown in the following examples.
Start the title in the margin
This very simple example shows how to start a title within the margin, rather than at the text's edge
\setuppapersize[A5]
\setuphead[chapter][alternative=margin]

\chapter{Sample chapter}

Number is in margin, not at text edge.

Chapter titles in new line
To have the chapter title simply in a new line a new command needs to be defined that takes care of this. It needs to be wrapped in \framed.
\setuppapersize[A5]
\setuplabeltext [en] [chapter=Chapter~]
\define[2]\MyChapter
  {\framed[frame=off,width=broad,align=flushleft]{#1\\#2}}
\setuphead [chapter] [command=\MyChapter]
\chapter{Foo Bar}

Expanded chapter titles
This example illustrates expanded chapter titles.
\setuppapersize[A5]
\def\MyChapterCommand#1#2%
  {\framed[frame=off,bottomframe=on,topframe=on]
     {\vbox{\headtext{chapter} #1\blank#2}}}

\setuphead[chapter][command=\MyChapterCommand, style={\ss\bfa}]
\setupheadtext[chapter=Chapter]

\chapter{My First Chapter}

Exercise numbers
For a textbook, suppose that you collect the exercises in a section at the end of each chapter, with each exercise a subsection having a short title, and the exercises should be numbered only by the subsection (not 1.6.7 for example, just 7). The usage:
\section{Exercises}

\exercise{Batteries}
What is the cost of energy from a 9V battery?  From a wall socket (the mains)?
The setup code:
\definehead[exercise][subsection]

\setuphead
  [exercise]
  [style=italic,
   numbercommand={\determineheadnumber[subsection]\currentheadnumber\gobbleoneargument}]
A complex graphical element under the chapter title
   \setuppapersize[A6]
   \setupcolors[state=start]
   \startuseMPgraphic{HeaderDeco}
           numeric w, h, repeats;
           path p[];
           w := OverlayWidth ; h := OverlayHeight ;
           repeats := abs(TextWidth/BodyFontSize);
           p[1] := unitsquare xscaled w yscaled h ;
           draw p[1] withcolor white;
           p[2] := fullcircle scaled BodyFontSize;
           p[3] := fullcircle scaled .25BodyFontSize;
           draw p[2] shifted (.5BodyFontSize,0);
           for i = 1 upto repeats:
               if odd i :
                   filldraw p[3] shifted (i*BodyFontSize+.5BodyFontSize,0);
               else :
                   draw p[2] shifted (i*BodyFontSize+.5BodyFontSize,0);
           fi;
          endfor;
   \stopuseMPgraphic

   \setuphead[chapter][command=\Myheader]
   \setupheadtext
         [chapter=Chapitre]
   \defineoverlay[HeaderDeco][\uniqueMPgraphic{HeaderDeco}]

   \def\Myheader#1#2{%
       \framedtext
           [width= \overlaywidth,
           height=6\bodyfontsize,
           background={foreground,HeaderDeco},
           offset=0pt,
           strut=no,
           frame=off,
           align=middle]{%
               \headtext{chapter} #1
               \blank[small]
               #2}}

\starttext
   \chapter{Here we go!}
\stoptext

Titles in margin
It is sometimes wanted to place the title of a section/subject etc in the margin next to the section text (instead of above it). This is achieved by the following setup:
\setuppapersize[A5]
\setuphead
   [subject]
   [alternative=text,distance=0pt,command=\MyHead,style=\sc]

\def\MyHead#1#2{\inmargin{#1 #2}}

\starttext

\subject{First Subject}
\input weisman

\subject{Second Subject}
\input ward

\stoptext

See the mailing list thread for more on this.
Headings numbered independent of chapters or other headings
If you want a heading that gets numbered without resetting at new sections or chapters (for example, for problems whose numbers increment throughout a book), here is a solution due to Hans on the mailing list:
% use a lower level head

\definehead
[Problem]
[subsubsubsection]

% cleaned up

\setuphead
[Problem]
[style=\ss\bf,
color=red,
before=\blank]

% use a label text

\setuplabeltext
[Problem=Problem ]

% use your own numbers

\setuphead
[Problem]
[ownnumber=yes]

% increment and feed

\newcounter\ProblemNumber

\def\problem#1%
{\doglobal\increment\ProblemNumber
\Problem{\ProblemNumber}{#1}}

% nicer here

\setuplist
[Problem]
[alternative=c,
criterium=all,
width=2em,
interaction=all]

% the test

\starttext

List of Problems

\blank[big] \placelist[Problem] \blank[big]

\section{Tufte}

\input tufte

\problem{First problem}

The first problem description.

\section{Another Tufte}

\input tufte

\problem{Second problem}

Second problem description.

\stoptext
Chapter headers
This is an example of chapter headings with an enlarged shadow behind them, based on 20/10/2004 a solution by Hans.
\setuppapersize[A5]

\useencoding[ffr]
\mainlanguage[fr]

\setupcolors[state=start]

\definefont[BigFontOne][Regular sa 3] %RegularSlanted sa 3(ori)%Sans sa 3:don't work (pb accents)
\definefont[BigFontTwo][RegularBold sa 2]   %%RegularSlanted

\definecolor[BigColorOne][r=.86,g=.850,b=.54]
\definecolor[BigColorTwo][r=.43,g=.425,b=.27]

\setuphead
   [chapter]
   [textcommand=\MyChapterText,
    color=BigColorTwo,
    style=\BigFontTwo]

\def\MyChapterText#1{\rlap{\BigFontOne\BigColorOne#1}\kern15pt#1}

\starttext

\chapter[chap:ques]{Question}

\stoptext

Figures in Headings
This example shows how to completely replace the chapter text and number by an image:
\setuppapersize[A5]
\setupexternalfigures[location=default] % needed only for the wiki to the find the figure

\useexternalfigure[section-1][cow][width=5cm,height=1cm]
\useexternalfigure[section-2][mill.png][width=5cm,height=1cm]

\setuphead
   [section]
   [command=\MySectionCommand]
\setuphead
   [subsection]
   [command=]

\def\MySectionCommand#1#2%
   {\externalfigure[section-\currentheadnumber]}

\starttext

\section{One}
\subsection{First subsection of Section One}
\section{Two}

\stoptext

There are a few snags though. MkII "forgets" to put the chapter in the TOC. So you have to set the deeptextcommand and deepnumbercommand separately instead (thus retaining the command that puts the chapter in the TOC), rather than setting the overall command, if you need a complete TOC.
\setuphead
    [chapter]
    [deeptextcommand=\MyChapterTextCommand,
     deepnumbercommand=\gobbleoneargument]      % hide chapter number

\def\MyChapterTextCommand#1%
    {\externalfigure[chapter-\currentheadnumber][height=5cm]}
Users of MkIV can safely rely on command and don't have to bother with the deep...command variants. However, \currentheadnumber does not seem to return anything but 0. Thus, the following code is required to define \MyChapterCommand when using MkIV:
\def\MyChapterCommand#1#2%
   {\externalfigure[chapter-\namedheadnumber{chapter}][height=5cm]}
Chapter head with absolute positioning of following text
No matter how many lines the chapter head runs to, the text will always start, e.g. 4cm below the top of the heading:
\setuppapersize[A6][A6]
\setupbodyfont[8pt]
\def\MyChapterCommand#1#2%
  {\vbox to 4cm\bgroup
     {#1\hskip.75em #2}
     \vss
     \egroup}
\setuphead[chapter][header=nomarking, command=\MyChapterCommand]
\starttext
\chapter{test} \input tufte
\stoptext

Section head with underlining to width of last line
A style called for section headings to be followed by a rule which extends only the width of the text. More tricky was the need to make sure that if the text ran onto another line, it was the length of the last line that was to be followed.
Hans came up with this cleverness, showing two alternate ways of doing it:
\setuppapersize[A5]

% ---- First solution ----

\def\FirstSolution#1#2%
  {\vbox\bgroup
   \setbox0\hbox{#1}
   \hsize.4\textwidth
   \beginshapebox#2\endshapebox
   \gdef\SetLastLineWidth{\xdef\LastLineWidth{\the\wd\scratchbox}}%
   \reshapebox
     {\setbox\scratchbox\hbox{\unhbox\shapebox}%
      \SetLastLineWidth
      \globallet\SetLastLineWidth\relax
      \box\scratchbox}%
   \scratchdimen\dimexpr\wd0+.25em+\LastLineWidth\relax
% \setbox2\ruledvbox   {\innerflushshapebox}
% why is correction needed
   \setbox2\vbox        {\vskip-\lineskip\innerflushshapebox}
   \setbox0\vbox to \ht2{\box0}
   \hbox{\box0\hskip.25em\box2}
   \offinterlineskip
   \vskip.25ex
   \blackrule[width=\scratchdimen,height=1pt]
   \egroup}

% ---- Second solution ----

\doglobal\newcounter\NextLinePos

\def\SecondSolution#1#2%
  {\vbox\bgroup
   \hsize.4\textwidth
   \doglobal\increment\NextLinePos
   \setbox\scratchbox\hbox{#1}
   \hbox{\vtop{\copy\scratchbox}\hskip.25em\vtop{#2}}%
   \offinterlineskip
   \scratchdimen\dimexpr\wd\scratchbox+.25em+
     \MPx{e:npl:\NextLinePos}-\MPx{b:npl:\NextLinePos}\relax
   \vskip.25ex
   \blackrule[width=\scratchdimen,height=1pt]
   \egroup}

\def\DoSecondSolution#1%
  {\bpos{npl:\NextLinePos}#1\epos{npl:\NextLinePos}}

% ---- Trying it out solution ----

% \showstruts

\starttext
\setuphead[section][command=\FirstSolution]
    \section{is this nice or not}
    \section{is this nice or not nice, that's the question}

\setuphead[section][command=\SecondSolution,deeptextcommand=\DoSecondSolution]
    \section{is this nice or not}
    \section{is this nice or not nice, that's the question}
\stoptext

As if that wasn't enough, Taco pointed out that \lastlinewidth is the easy route to finding the width of the last line. Use something like:
\optimizedisplayspacingtrue\setlastlinewidth % core-mat macro
\global\advance\lastlinewidth-\hangindent\par % adjust
\blackrule[width=\lastlinewidth,height=1pt]
Flushing section head data without typesetting them in the text
The following is probably a very special case. Hoever suppose you need to place section information like the title e.g. in the topspace area. You want that the section is still displayed in the TOC, but you do not want that at the spot where \startsection[title=...,list=...] resides there is any trace of it. The command to be used to hide the section title is:
\setuphead
   [section]
   [placehead=hidden]
Be aware that with this setting indeed the section title is not shown and no white space is inserted. However in this way also the list entry for the TOC is gone. What you can do in such cases is to use the following command in connection with the above mentioned setting:
\setuptexttexts[{\placerawheaddata[section]}
What happens is that the information in the \startsection[title=...,list=...] command is passed to the texttexts, which are flushed at every page. In order to see when it is flushed you might place e.g. !!! in front of the \placerawheaddata[section].
The result is a complete TOC without any trace of the section heading in the text.
Test:
\setuphead
   [section]
   [placehead=hidden,
    page=yes]

\setuphead
   [subsection]
   [placehead=yes,
    page=yes,
    continue=yes,
    style=\it]

\setuptexttexts[{\placerawheaddata[section]}]

\starttext

\placelist[section,subsection] \page

\startsection[title=First section]

   \startsubsection[title=First subsection]
      Lorem ipsum \dots
   \stopsubsection

   \startsubsection[title=second subsection]
      Lorem ipsum \dots
   \stopsubsection

\stopsection

\startsection[title=Second section]

   \startsubsection[title=First subsection]
      Lorem ipsum \dots
   \stopsubsection

\stopsection

\stoptext
table> /td>