Difference between revisions of "Command/bleed"
< Command
Jump to navigation
Jump to search
| Line 68: | Line 68: | ||
\bleed [width=1cm,height=2cm,location=tr]{% | \bleed [width=1cm,height=2cm,location=tr]{% | ||
\externalfigure [mill] [width=2cm,height=3cm,frame=on,rulethickness=1pt,framecolor=cyan]} | \externalfigure [mill] [width=2cm,height=3cm,frame=on,rulethickness=1pt,framecolor=cyan]} | ||
| + | text after. | ||
| + | |||
| + | \stoptext | ||
| + | |||
| + | </context> | ||
| + | </cd:example><cd:example title=""><context source="yes"> | ||
| + | |||
| + | \setuppapersize[A6] | ||
| + | \setupheadertexts[] | ||
| + | |||
| + | \showframe | ||
| + | |||
| + | \starttext | ||
| + | |||
| + | text before | ||
| + | \externalfigure[mill][width=2cm,frame=on,rulethickness=1pt,framecolor=red] | ||
| + | text after. | ||
| + | |||
| + | text before | ||
| + | \bleed [width=1cm,height=2cm,location=l]{% | ||
| + | \externalfigure [mill] [width=\bleedwidth,height=\bleedheight,frame=on,rulethickness=1pt,framecolor=cyan]} | ||
text after. | text after. | ||
Revision as of 18:00, 8 May 2024
Contents
\bleed
Summary
The command \bleed is used to modify the actual dimension of the place allocated to a figure.
Settings
Description
Have a look into the Details manual, it makes no sense to repeat it here.
Examples
Example 1
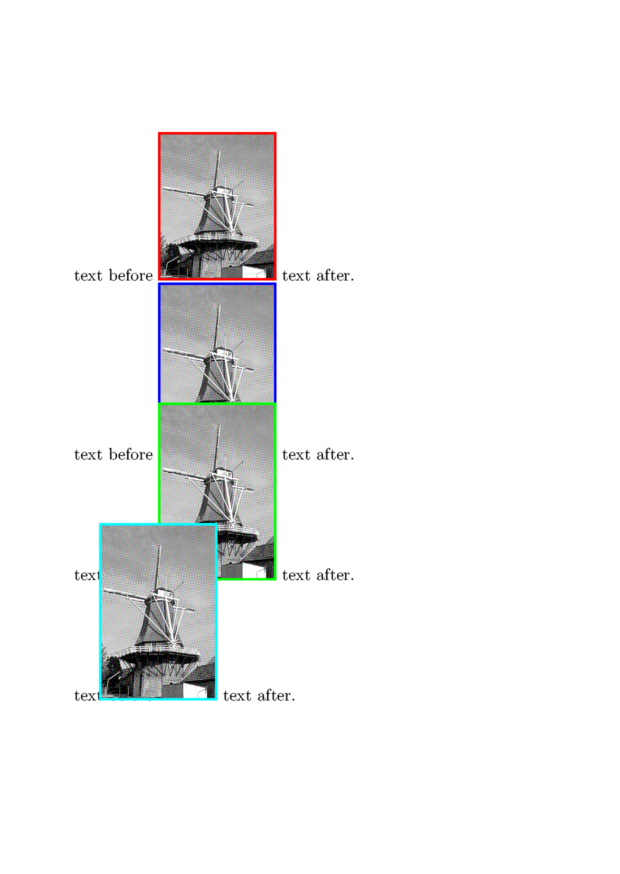
\setuppapersize[A6]
\setupheadertexts[]
\starttext

text before
\externalfigure[mill][width=2cm,frame=on,rulethickness=1pt,framecolor=red]
text after.

text before
\bleed                 [width=2cm,height=3cm,location=l]{%
\externalfigure [mill] [width=2cm,height=3cm,frame=on,rulethickness=1pt,framecolor=blue]}
text after.

text before
\bleed                 [width=2cm,height=2cm,location=l]{%
\externalfigure [mill] [width=2cm,height=3cm,frame=on,rulethickness=1pt,framecolor=green]}
text after.

text before
\bleed                 [width=1cm,height=2cm,location=l]{%
\externalfigure [mill] [width=2cm,height=3cm,frame=on,rulethickness=1pt,framecolor=cyan]}
text after.

\stoptext
obviously location is key
\setuppapersize[A6]
\setupheadertexts[]
\starttext

text before
\externalfigure[mill][width=2cm,frame=on,rulethickness=1pt,framecolor=red]
text after.

text before
\bleed                 [width=2cm,height=3cm,location=tr]{%
\externalfigure [mill] [width=2cm,height=3cm,frame=on,rulethickness=1pt,framecolor=blue]}
text after.

text before
\bleed                 [width=2cm,height=2cm,location=tr]{%
\externalfigure [mill] [width=2cm,height=3cm,frame=on,rulethickness=1pt,framecolor=green]}
text after.

text before
\bleed                 [width=1cm,height=2cm,location=tr]{%
\externalfigure [mill] [width=2cm,height=3cm,frame=on,rulethickness=1pt,framecolor=cyan]}
text after.

\stoptext

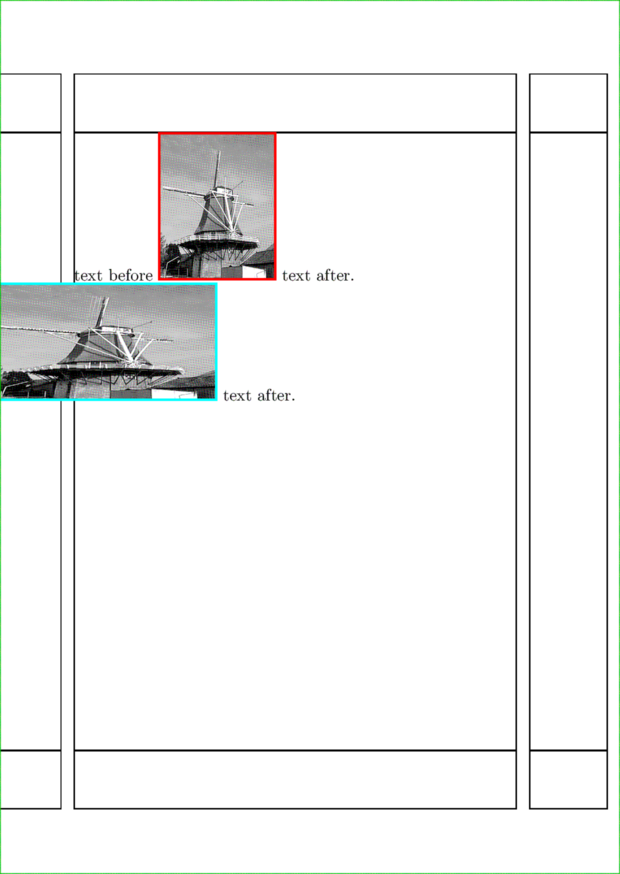
Example 3
\setuppapersize[A6]
\setupheadertexts[]

\showframe

\starttext

text before
\externalfigure[mill][width=2cm,frame=on,rulethickness=1pt,framecolor=red]
text after.

text before
\bleed                 [width=1cm,height=2cm,location=l]{%
\externalfigure [mill] [width=\bleedwidth,height=\bleedheight,frame=on,rulethickness=1pt,framecolor=cyan]}
text after.

\stoptext