Movie
(this page is a work in progress, this is a compagnon page to a MAPs article about the same subject).
Introduction
If you wish to make an animation in your document, see the Animation page. This page will explain how to MetaFun to create a mp4 movie. Such movie can be embedded in a presentation, put on YouTube, etc, this will be a real movie !
The steps involved to realize such a movie are to (1) make a pdf such as each page is a frame of the movie, (2) convert the pdf pages to jpeg images, (3) assemble these images into a mp4 movie.
Tutorial
An animation is simply a series of images shown in order, one at a time. The number of images per unit of time determines the speed of the movie, a factor usually referred to as the framerate. For instance, if we generate 300 images, we can create a 10-second movie at 30 frames per second, or a 20-second movie at 15 frames per second.
This tutorial will be to design and animate a movie showing particles moving along circles. The different images needed for the animation will be pages from the same PDF. The general structure of the code is as follows:
\starttext
  \dorecurse{300}{ % Each of the 300 images
    \startMPpage
      % Insert here code to draw an image
    \stopMPpage
  }
\stoptext
An MPpage has the size of the bounding box of all combined objects on the current page, so if objects move within the page, the page size will change. A solution to maintain control is to introduce a frame, which we can visualize as a camera frame. In the following, we refer to this frame as TheFrame. We can keep this frame fixed while subjects move within it, or we can keep subjects steady and move the frame, or even do both! In fact, if we think of a real camera, this is exactly the same concept. Let's consider a fixed square frame here, called TheFrame:
\startMPpage
  path TheFrame ;
  TheFrame := fullsquare scaled 80 ;
  % the code...
  setbounds currentpicture to TheFrame ;
\stopMPpage
It is a good idea to perform declarations and calculations only once, and therefore, to place them in MPinclusions before the drawings are actually done. Since we intend to move a particle along a path, the position of the particle depends on the current frame. This information will be stored in the variable currentframe. In the simplest case, the current frame corresponds to the value of the loop dorecurse, which can be accessed using currentframe := #1;. The position of the object will be determined by currentframe/TotalNbFrames along the path. Now, we are ready for the complete code :
\starttext
\startMPinclusions
 path TheFrame ; TheFrame := fullsquare scaled 80 ;
 path ThePath , TheObject , ObjectInMovement ;
 ThePath   := fullcircle scaled 50 ;
 TheObject := fullcircle scaled 8 ;
 TotalNbFrames := 300 ;
\stopMPinclusions

\dorecurse{300}{
\startMPpage
  currentframe := #1;
  ObjectInMovement := TheObject shifted
    (point (currentframe/TotalNbFrames) along ThePath );
  draw ThePath withcolor blue ;
  fill ObjectInMovement withcolor red ;
  setbounds currentpicture to TheFrame ;
\stopMPpage }
\stoptext
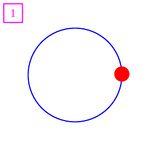
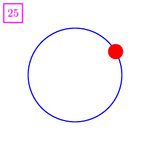
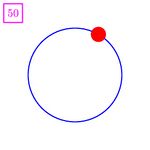
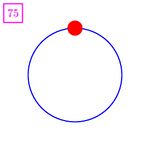
Here are some excerpts of this file (frame number in magenta in the top-left of each image):
The number of frames needed for a movie can be large. For example, consider a five-minute movie at 30 frames per second: we would need 5 x 60 x 30 = 9,000 frames. If there are a lot of calculations for each frame, this could pose an issue. Therefore, during development, it could be useful to speed up the the processes : sometimes, it's possible to speed up or adjust the timing. For instance, assume the loop in the preceding code at line 12 is changed to:
currentframe := (#1-1)*100 ;
if currentframe == 0: currentframe := 1; fi;
The first page of the file will correspond to frame 1, the second to frame 100, the third to frame 200, and the last one, the fourth, to frame 300. This allows us to obtain a rough idea of the movie without generating every single page. However, as will become clear later, this approach is not always feasible.
Now that we have a PDF file, we need to convert the PDF pages to JPG images. This can be easily done with external tools like ImageMagick (https://imagemagick.org), a free open-source software for manipulating digital images. Once installed on your system, the command
convert myfile.pdf p_%03d.jpg
will convert the 300 pages of myfile.pdf to 300 images named p_000.jpg, p_001.jpg, ..., p_299.jpg. The next step is to assemble the images into a movie, which is done with the free ffmpeg (https://ffmpeg.org) tool. The command
ffmpeg -y -r 30 -i JPGdir/p_%03d.jpg -c:v libx264
       -pix_fmt yuv420p  Movie-a.mp4
assemble this movie :
Project1-A :
Showcase of some movies made with MetaFun
Project1-C2-2160: Project3-C: Project3-B: Project2-B2 : Project2-A: Project1-C2-1080: Project1-B: Project1-B-Slow : Project1-A :


